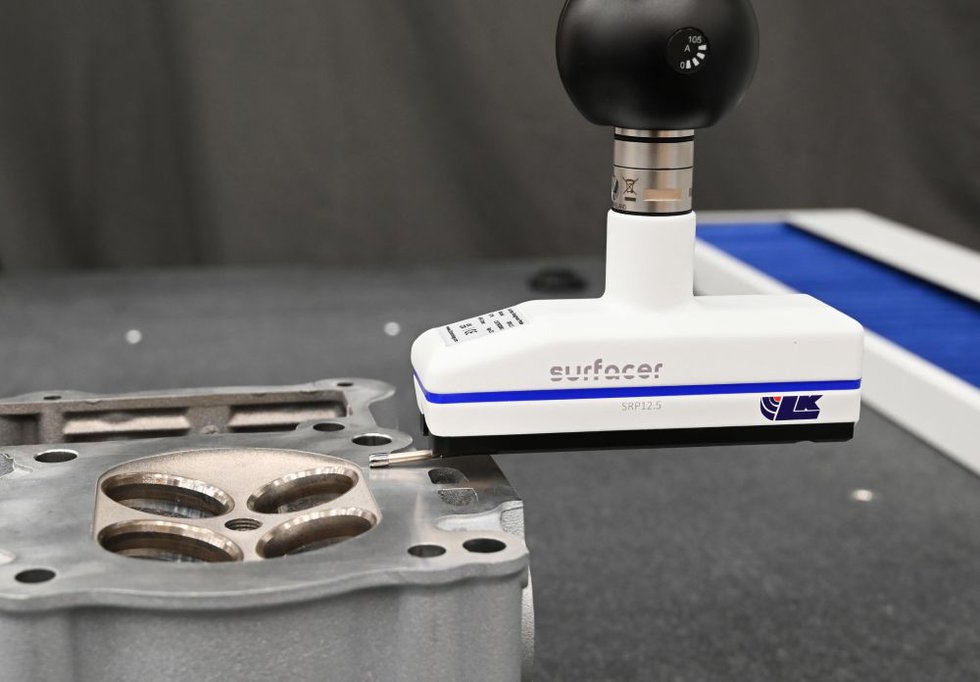
LK Metrology has unveiled its SURFACER SRP plug-and-play probe. The solution has a resolution of one micron for analysing the roughness of a component’s surface as part of a CNC measuring cycle on any CMM, if it has an industry-standard probe head.
The sensor eliminates the need for a secondary surface roughness inspection. Manufacturers can conduct the inspection process on a component in a single setup in a CMM environment, saving time and money. The SURFACER SRP prioritises versatility and ease of use, with the solution coming with downloadable application software, eliminating the need for third-party software.
“By integrating surface roughness measurement directly onto the CMM, we are providing manufacturers with a powerful tool to streamline their inspection processes, reduce costs and enhance product quality,” said Dave Robinson, Marketing Manager at LK Metrology. “The ability to perform multiple metrology functions on a single platform eliminates the need for time-consuming transfers of components and ensures greater accuracy by maintaining part orientation between measurements.”
About the SURFACER SRP
Users can switch between touch probes, tactile scanning probes, non-contact laser scanners, and the roughness probe. The solution's mounting is compatible with change racks, including LK Metrology’s most recent additions, allowing for automated sensor changing and improved operational efficiency.
The roughness probe accommodates three interchangeable, skidded, stainless-steel probe modules. These probe modules include:
- One that evaluates flat, conical, and cylindrical surfaces.
- A second to measure concave, convex, and spherical surfaces.
- And the final one inspects grooves more than 3mm wide by less than 10mm deep, or steps of a similar height.
The CMM ensures the stylus is in contact with the part by positioning it. Afterwards, the machine axes will remain stationary while the probe moves the stylus across the surface that’s being inspected. Users can transfer data for analysis and to simplify installation by using the solution's wireless communication capabilities with the CMM computer via a Bluetooth 4.0 adapter.
The skid acts as a straight-line datum in the measurement process, guiding the stylus across a surface to ensure probe stability. Travelling independently in front of the skid, the stylus records surface deviations as the difference in the relative movements of the two elements in the Z-axis.
The SURFACER SRP’s integrated preload mechanism helps to further enhance precision levels. During stylus operation, it isolates from the CMM kinematics, ensuring accurate and consistent results. The force exerted by the stylus tip is less than four thousandths of a Newton, ensuring that surface deformation is avoided. Additionally, the measurable roughness range is 0.5 to 6.5 Ra.


