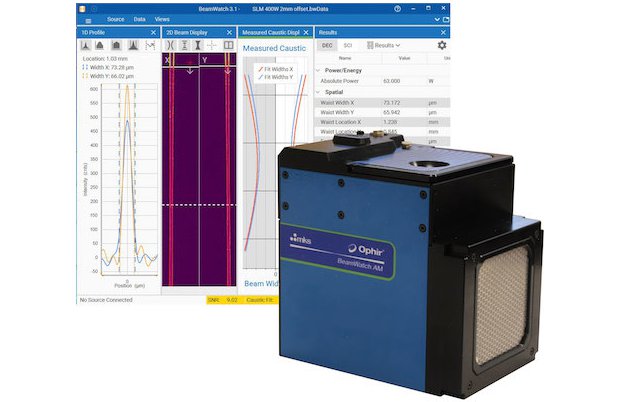
As MKS Instruments gears up for this year's TCT Show, Christian Dini, Director Global Business Development at Ophir (MKS Instruments) discusses the company's TCT Award-nominated BeamWatch AM monitoring system and the significance of metrology products in the adoption of additive manufacturing technologies.
TCT: MKS Instruments has been investigating technology solutions for the photonics industry since 1961, can you explain a little about how it sees the maturity of the additive manufacturing market now?
Christian Dini: Indeed, we have been following and supporting the developments in additive manufacturing (AM) from day one. In the past 25 years the technology has seen a significant evolution. Starting as a niche technology only used in research and development for rapid prototyping and medical preparation of surgery, AM today is on its way to the high-volume production. Still, significant growth can be achieved by concentrating on low hanging fruit applications such as manufacturing individual or small quantities of parts. But we see an increasing effort to revolutionise target markets such as the automotive and the air and space industry. Secondary parts are already produced in AM technology but there is still one issue on the way to mass production and especially to the use in production facilities for key metal parts: repeatability. No matter whether there are multiple lasers working on one part or multiple additive manufacturing systems producing the same parts – the product quality needs to be reliably high and replicable.
TCT: The TCT Awards is upon us and Ophir's BeamWatch AM product has been shortlisted for the Inspex Hardware award. Can you tell us about why the product is so innovative and what gap it addresses in the market?
CD: Having talked about reliability, this is directly connected with repeatability as well. If you want to rely on your focused laser beam you need to be able to measure it repeatedly and accurately. Ophir BeamWatch AM is the industry's first non-contact laser beam monitoring system for additive manufacturing. Thus, there is no “interaction” between the focused beam and the measurement gauge. Since the laser beam isn’t touched at any time in the beam profiler section of the system where it enters first, it remains entirely unaffected by the measurement device; nor can the beam damage the device itself. BeamWatch AM closes the “repeatability gap”, it always delivers reliable results in R&D, production and in the field.

TCT: The performance of the laser and the meltpool has often been called a rate-limiting step for the adoption of additive, how does BeamWatch AM address this?
CD: Talking about the meltpool we need to take a look into the line energy which directly depends on the time the laser beam interacts with the material and the power density of the laser beam. The power density itself is the ratio of laser power and focus spot size depending on the focal position. One key issue in that respect that could hardly be measured so far is the focus shift. BeamWatch AM not only measures key beam quality parameters in real-time. For the first time it is possible to measure the dynamic focal shift during laser startup of powder bed fusion manufacturing processes; which occurs by the way, a lot of times during the build process as the laser is - according to the product contour and software set build strategy - switched on and off very often leading to a highly dynamic effect. Measuring all those key parameters allows users to more easily determine steady power density delivered at the build plane, providing assurance of consistent metallurgy.
TCT: How significant do you believe metrology products are to the adoption of additive technologies, and can you give a specific example of where they have improved the process?
CD: Let us talk about a concrete example. A quality inspection of high quality AM manufactured parts showed a significant decrease in the quality: BeamWatch AM was used to measure the laser beam. The measurements indicated a focus shift after the appearance of quality problems. The experts suspected either some parts weren’t properly cooled or that a lens or protective window were damaged. A physical check revealed that a protective glass located in the middle of the beam delivery indeed was cracked. The flaw was quickly fixed. Without BeamWatch AM such conclusions could heretofore only be drawn after elaborate experimental investigations by the systems manufacturer. But now, the real time video style non-contact measuring technology makes it possible to monitor dynamic changes and localise and assess the reasons for the quality problems directly. More than that, it can easily be used to regularly monitor the laser beam in order to prevent the deterioration of the product quality.
TCT: Many innovations like this one eventually become part of the OEM's build, is this the trajectory for this project?
CD: MKS, and especially the Ophir brand is cooperating with many laser manufacturers and offers a wide range of OEM products. We’re open to any OEM willing to explore the specific system requirements and integrating our measurement device in an AM solution. Once additive manufacturing has really made its way into high-volume production it will surely be the next step especially in digital manufacturing environments.


